Free restoration invoice template and home repair invoice template, with filled-in samples, what to include, and versions for water, fire, mold and storm.

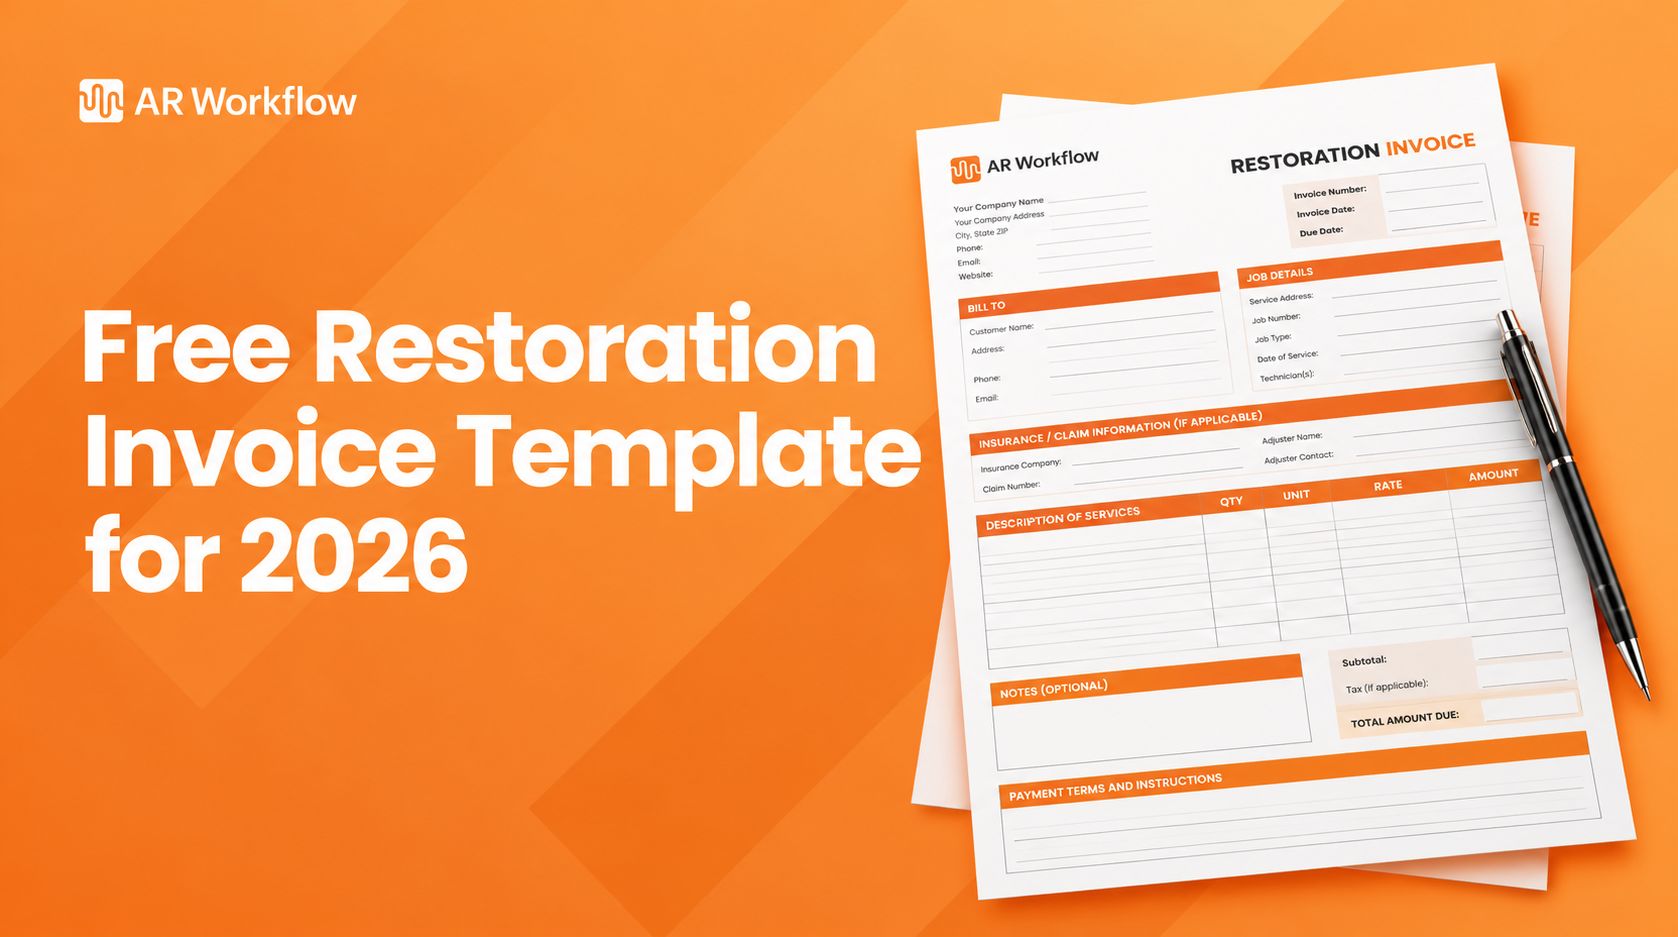
Restoration companies have plenty to keep track of once a job is completed, and billing is one of the tasks that still needs attention. A restoration invoice template makes that step faster and more consistent.
Before an invoice goes out, someone needs to make sure the charges match the work performed and that the customer has enough information to understand the bill.
Having a restoration invoice template makes that process easier to manage. It gives your team a consistent format to work from without having to prepare every invoice from scratch, whether you bill from a spreadsheet, a PDF or accounting software like QuickBooks.
This article covers what to include in the template, a filled-in sample restoration invoice, the mistakes that slow payment down, and how to adapt the same itemized invoice for different restoration jobs, including a free repair invoice template for smaller home repair work.
KEY TAKEAWAYS
Here's your free restoration invoice template:
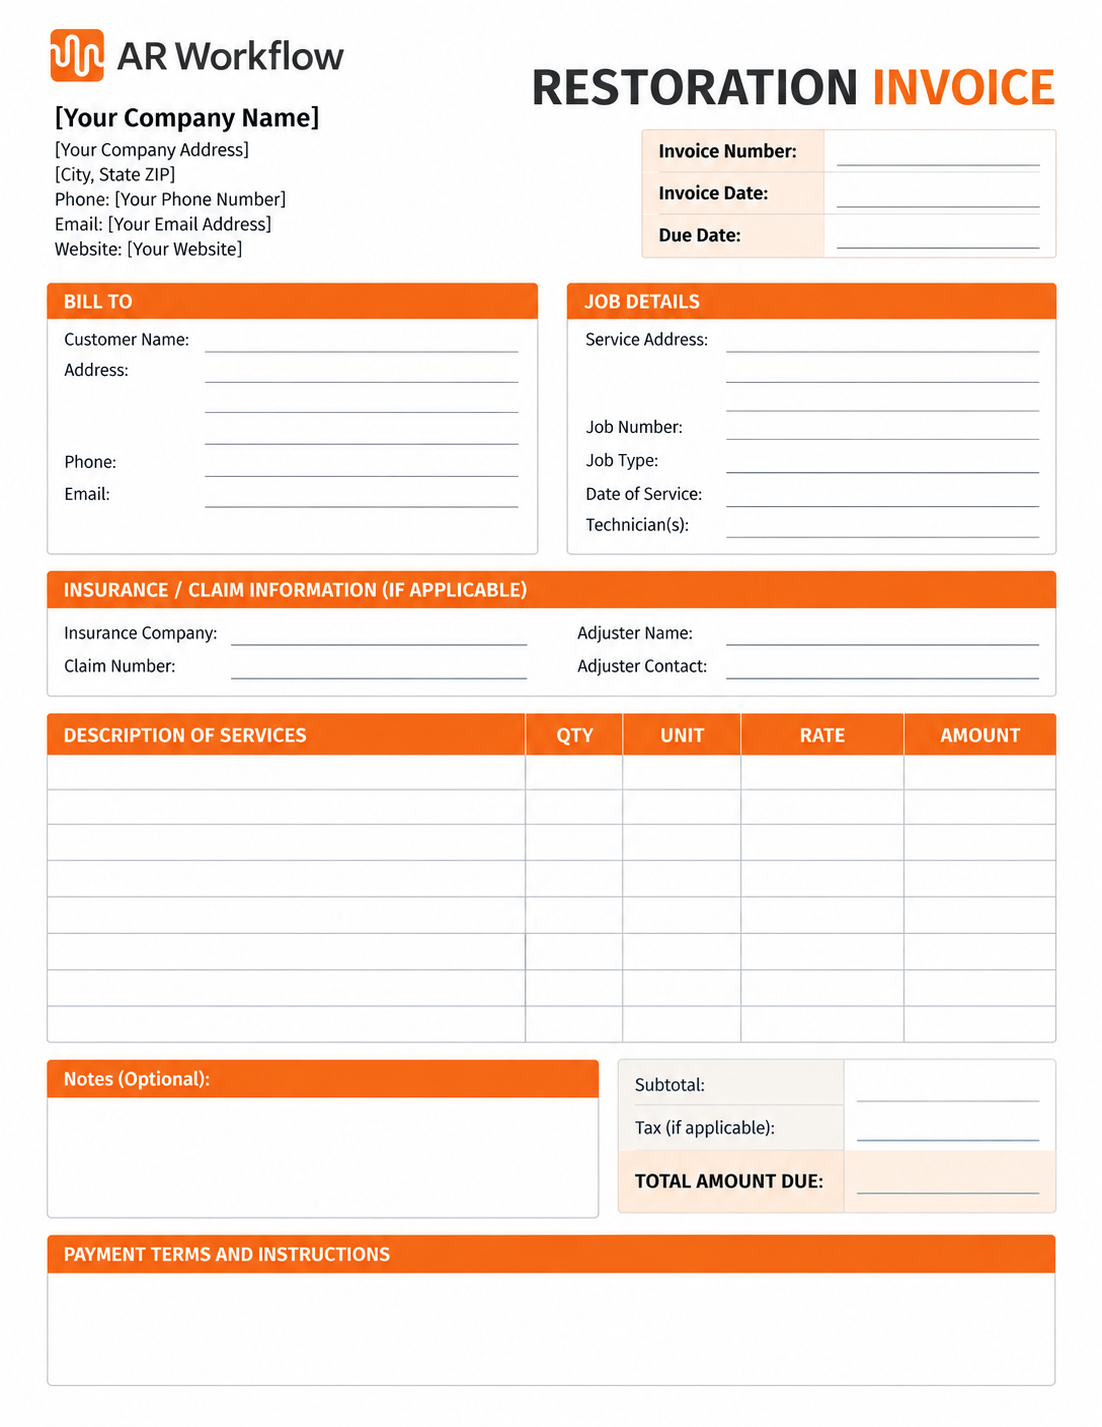
Free restoration invoice template with job, claim, itemized charges and payment terms.
Creating a restoration invoice is straightforward. You just need to include the necessary details about the work completed and a clear breakdown of how much each service costs.
| Section | What goes in it |
|---|---|
| Company and customer information | Legal business name, contact details, logo, client name and billing address |
| Invoice number and job details | Invoice number, invoice date, service address, service dates, job number |
| Insurance and claim information | Carrier name, claim number, adjuster contact if involved |
| Itemized services and charges | Each service with quantity, rate and amount |
| Total and payment instructions | Subtotal, taxes, deposits, balance due, due date, methods and terms |
Every restoration company invoice needs to make it clear who's issuing the bill and who's responsible for receiving it.
This means including your company's legal business name and contact information, such as its address, phone number, and email. You can also include your logo so customers can easily recognize the invoice as coming from your business.
The same goes for the client information. Their full name and billing address should appear on the invoice so there's no confusion about who the charges belong to.
One thing to keep in mind, though, is that homeowners aren't always the person handling the bill. For example, if your team completes restoration work at a rental property, the property manager may be the one receiving and processing the invoice.
That distinction matters because sending the bill to the wrong person can delay payment before the customer even has a chance to review the charges.
Beyond identifying who's involved, your invoice should make it easy to identify which restoration job you're billing.
That's what the invoice number and job details are for.
An invoice number is simply a unique reference for each bill your company issues. It helps your team keep track of individual invoices, especially when the same customer has multiple jobs or outstanding payments.
Along with that number, your invoice should include:
These details also help when a project involves separate stages of work.
For example, if your company handles both mitigation and reconstruction at the same property, the job details help distinguish which work the current invoice covers. Our mitigation invoice guide, linked below, covers the mitigation stage in detail.
That makes it easier for your team and the recipient to refer to the correct bill if questions come up later.
If the restoration work involves an insurance claim, the invoice should also include the information needed to connect it to that claim.
This usually means including the insurance carrier's name and the claim number. You may also include the insurance adjuster's contact information if they're involved in reviewing the charges.
The claim number is especially important here because it identifies the specific loss that the insurance company is handling.
Think about a property owner who has filed separate claims for storm damage and flooding. Without the correct claim number, the person reviewing your invoice may have trouble determining which claim the charges belong to.
Including these details helps keep the invoice connected to the appropriate claim and supporting documentation.
There's also an important distinction between who handles the insurance claim and who actually owes the payment.
Even when an insurance company reviews the charges, the property owner may still be responsible for paying your business, depending on the agreement.
That's why the claim information and billing information serve different purposes on the invoice. One identifies the insurance claim, while the other identifies who should receive and pay the bill.
This is the part of the invoice that explains what services were provided and what the customer is paying for.
A total amount alone doesn't tell the recipient much about the work completed. They need to see how your company arrived at that figure, especially when the job involved several services or equipment costs.
That's what itemized charges provide.
Each line item should identify a particular service or cost, along with the amount charged for it. Depending on the service, you may also need to show the quantity and rate used to calculate that amount.
For example, a water damage restoration invoice may include water extraction as one charge and drying equipment as another.
If your team used five air movers for three days at $25 per unit per day, the equipment charge would look like this:
| Description | Quantity | Duration | Rate | Total |
|---|---|---|---|---|
| Air mover rental | 5 units | 3 days | $25 per unit/day | $375 |
The same principle applies to labor charges, where the total may depend on the number of hours worked and the agreed hourly rate.
With this level of detail, the recipient can understand what makes up the bill and how your company calculated the charges. It also makes it easier to answer questions about individual costs without having to explain the entire invoice again.
Once you've accounted for the individual charges, the invoice needs to show the final amount the customer owes.
This includes the subtotal, which is the combined amount of the itemized charges before any applicable taxes or adjustments.
The final total should account for those additional amounts, along with any payments the customer has already made.
For example, if the restoration work costs $10,000 and the customer has already paid a $2,000 deposit, the invoice should clearly show that only $8,000 remains due.
Knowing how much to pay is only part of the information the customer needs. They also need to know when the payment is due and how to make it.
That's why your invoice should include:
Tip: On insurance jobs, the online payment link belongs on the copy that goes to the homeowner or customer who owes a balance, such as the deductible. Send the carrier or adjuster the invoice with claim details and documentation, never a payment link.
These details give the customer clear instructions for settling the bill. They also establish the payment deadline your team can refer to when monitoring outstanding invoices.
Without that information, even a correctly prepared invoice may lead to unnecessary questions or delays before the customer can complete the payment.
Seeing a completed restoration company invoice makes the template easier to use. Below is a simplified example for a residential water loss with an insurance claim. The rates are illustrative only, so use your own price list or the pricing agreed for the claim.
SAMPLE
Invoice #: 2026-0412 Invoice date: April 18 Due: Net 30
Bill to: Homeowner name and billing address Service address: Loss location
Carrier: Insurance company name Claim #: Claim number from the carrier Date of loss: April 9
Job #: W-1187, Mitigation phase, service dates April 9 to April 14
| Line item | Qty | Unit | Rate | Amount |
|---|---|---|---|---|
| Emergency service call (after hours) | 1 | each | $250.00 | $250.00 |
| Water extraction, carpet and pad | 450 | sq ft | $0.95 | $427.50 |
| Air mover | 6 | unit/day x 4 days | $25.00 | $600.00 |
| Dehumidifier, large | 2 | unit/day x 4 days | $95.00 | $760.00 |
| Remove and dispose of wet drywall, 2 ft flood cut | 80 | linear ft | $3.50 | $280.00 |
| Antimicrobial application | 450 | sq ft | $0.35 | $157.50 |
| Daily moisture monitoring and readings | 4 | day | $65.00 | $260.00 |
| Subtotal | $2,735.00 | |||
| Less deposit received | -$500.00 | |||
| Balance due | $2,235.00 |
Notice what makes this an itemized invoice rather than a single lump sum: every charge has a quantity, a unit and a rate, and the equipment lines show both the number of units and the number of days. That is exactly what an adjuster or homeowner checks first. For a longer worked example, see our water damage restoration invoice guide.
Tip: If the carrier's adjuster wrote the scope in Xactimate, match your line descriptions and units to that estimate where you can. A reviewer can then compare your invoice to the approved scope line by line instead of asking you to explain each charge.
Now that you know what information belongs on the invoice, the next step is to use the template to handle invoicing for your completed jobs.
Here's how to complete it using the records from your restoration job.
| 1 | Customize the template with your company details |
| 2 | Enter the customer and restoration job information |
| 3 | Add the completed services and their costs |
| 4 | Calculate the final invoice amount |
| 5 | Review and send the completed invoice |
Start by opening the template and replacing the sample business information with your own.
Add your company's legal name and contact details, then replace the placeholder logo if the template includes one. You can also adjust the colors or formatting to match your existing business documents.
Once you're happy with the layout, save a blank copy with your company information already in place.
Keep this as your master template so your team can use it for future invoices without having to enter the same information again.
Next, fill in the details of the restoration job you're billing for.
Use your job records to enter the customer's billing information and the property address. Then, add the invoice date and the service dates that correspond to the completed work.
Assign a unique invoice number and include your internal job reference if you use one.
If the job involves an insurance claim, enter the carrier's name and claim number using the information from your records.
One thing to note is that some jobs involve separate billing stages. If your company handles mitigation and reconstruction under the same project, make sure the invoice identifies the correct work and billing period.
With the job information in place, you can start filling out the itemized charges.
Refer to your completed work records and enter each billable service on a separate line when appropriate. Use the same descriptions and billing units that support your agreed charges.
For example, if your team used drying equipment for four days, enter the number of units and the daily rate based on your equipment records.
You should also account for any changes to the original scope of work.
If your team performed additional services beyond the original estimate that the customer or other authorized party approved, include those charges when the billing agreement allows them.
Before moving on, compare the invoice lines with your job documentation to make sure you haven't missed any billable work or included the same charge twice.
Once you've entered all the charges, calculate the amount due.
If your template doesn't calculate totals automatically, multiply the quantity by the rate for each applicable line item. Include the billing duration for equipment or services that use time-based rates.
Then, add the individual charges to get the subtotal.
Apply any relevant taxes or adjustments, and subtract deposits or partial payments the customer has already made.
If you're using Excel, formulas can handle these calculations for you. Just make sure the formulas still cover every charge, especially if you've added new rows to the template.
The final balance should match the amount your company expects to collect for the work covered by that invoice.
Before sending the invoice, give it one final review against your job records.
Check the service descriptions and charges to ensure accurate billing. Pay particular attention to equipment durations and any additional work that wasn't part of the original scope.
You'll also want to confirm that the invoice goes to the correct billing contact and that the payment instructions are accurate.
If the recipient requires detailed documentation, include it with the invoice or provide it through the agreed submission process. For insurance-related jobs, this may include relevant work authorizations or equipment usage records.
Once everything checks out, save the completed invoice as a PDF to preserve its formatting, then print or send it to the designated recipient.
Record the date you sent it and keep a copy with the job file. Your team can use that information later when checking payment status or handling billing questions.
Bring one overdue invoice.
We'll show you how AR Workflow tracks the balance and automates follow-up until it is paid.
Most slow payments on restoration jobs trace back to a handful of avoidable invoice problems. Check for these before anything goes out.
Fixing these takes minutes per invoice and removes the most common reasons a restoration invoice gets kicked back. It also gives your team a clean due date to work from once automated payment reminders take over.
Although emergency restoration services vary, the invoicing process remains the same. You just need to adjust the itemized charges based on the work your company completed.
The table below shows how you can adapt the template for different restoration jobs.
| Restoration job | Example invoice line items | How to list the charges |
|---|---|---|
| Water damage restoration | Water extraction, selective demolition, dehumidifiers, moisture readings | Equipment by day, labor by hour, or services by unit |
| Fire restoration | Removal of damaged materials, soot cleaning, deodorization, content cleaning | Labor hours, treated area, or individual service charges |
| Mold remediation | Containment setup, HEPA air filtration, mold removal, clearance testing when applicable | Equipment days, affected areas treated, or labor hours |
| Storm restoration | Emergency services such as board-up, debris removal and disposal, temporary roof protection | Labor hours, materials used, or service charges |
Ultimately, what matters is that the charges match your job records and the rates agreed upon for the project, no matter what type of restoration job it may be. For job-specific versions, see our fire and smoke restoration invoice template and mold remediation invoice guide.
Not every job is a claim. Restoration companies also take on drywall patches, trim and paint touch-ups, small leak repairs and punch-list work after a rebuild. For those, a home repair invoice template is faster than the full restoration format, because there is no carrier, no claim number and usually no equipment days to track.
The structure stays the same: who you are, who pays, what you did, what it costs and how to pay. What changes is how much detail each section needs.
| Section | Restoration invoice | Home repair invoice |
|---|---|---|
| Claim details | Carrier, claim number, date of loss | Usually none. Remove the fields so they do not confuse the customer. |
| Line items | Units matched to the approved scope, equipment by day | Each repair as its own line, plus materials and any trip charge |
| Pricing | Price list or agreed claim pricing | Flat price per repair or time and materials, as quoted |
| Payment terms | Often Net 15 or Net 30, tied to the work authorization | Often due on receipt, since the homeowner is there when the work finishes |
| Supporting documents | Moisture logs, photos, work authorization | Before and after photos, plus any workmanship warranty note |
Here is a free repair invoice template you can paste into a document, spreadsheet or your accounting software. Replace the bracketed fields with your own details.
REPAIR INVOICE TEMPLATE
[Company name] | [Address] | [Phone] | [Email] | License # [number, if your state requires it on invoices]
Invoice #: [number] Invoice date: [date] Payment terms: [Due on receipt / Net 15] Due date: [date]
Bill to: [Customer name, billing address] Service address: [Job address] Date of work: [date or dates]
Line items: [Repair description] | [Qty] | [Unit] | [Rate] | [Amount]
Materials: [Description] | [Amount]
Subtotal: [amount] Tax: [if applicable in your state] Less deposit: [amount] Balance due: [amount]
How to pay: [Payment link for card or ACH, check payable to company name]. Notes: [Warranty terms, photos attached, questions contact].
Here is the template filled in for a small post-leak repair with no insurance claim. The rates are illustrative only, so use your own pricing.
| Line item | Qty | Unit | Rate | Amount |
|---|---|---|---|---|
| Drywall patch, tape and texture | 3 | each | $145.00 | $435.00 |
| Paint repaired walls, two coats | 220 | sq ft | $1.75 | $385.00 |
| Replace baseboard | 36 | linear ft | $6.50 | $234.00 |
| Materials (drywall, compound, primer, paint, baseboard) | 1 | lot | $186.40 | $186.40 |
| Trip charge | 1 | each | $75.00 | $75.00 |
| Balance due (due on receipt) | $1,315.40 |
Keep each repair on its own line even when the job is small. If the homeowner questions the paint charge, you can talk about that one line instead of defending a single "repairs: $1,315" total. Check with your accountant whether your state taxes repair labor, materials or both before you add a tax line.
Tip: On small repair jobs, the best time to get paid is before the truck leaves. Send the invoice from your phone with a card or ACH payment link while the homeowner is looking at the finished work. Our contractor invoice template and plumbing invoice template show the same approach for service work.
If the customer does not pay on the spot, the follow-up should start within days, not weeks. Our payment reminder email templates cover what to send, and if you invoice from QuickBooks Online, QuickBooks collections follow-up can pick up every open repair invoice automatically.
By now, you should have everything you need to prepare a restoration invoice that accurately reflects the work your team completed.
But there's one more thing worth considering: what happens after you send that invoice?
After all, sending the bill doesn't always mean you'll get paid right away, and while your team can handle these situations through manual follow-ups, that work adds up when you have dozens of outstanding invoices to manage. Our guide to unpaid invoices, in the reading list below, covers what to do when a bill goes past due.
The more time your team spends managing those tasks, the less time they have for other responsibilities. Meanwhile, your company still needs payment from completed jobs to cover ongoing expenses.
So, while having a restoration invoice template helps you prepare and send bills more efficiently, it's also worth thinking about how you'll manage those invoices until customers actually pay them.
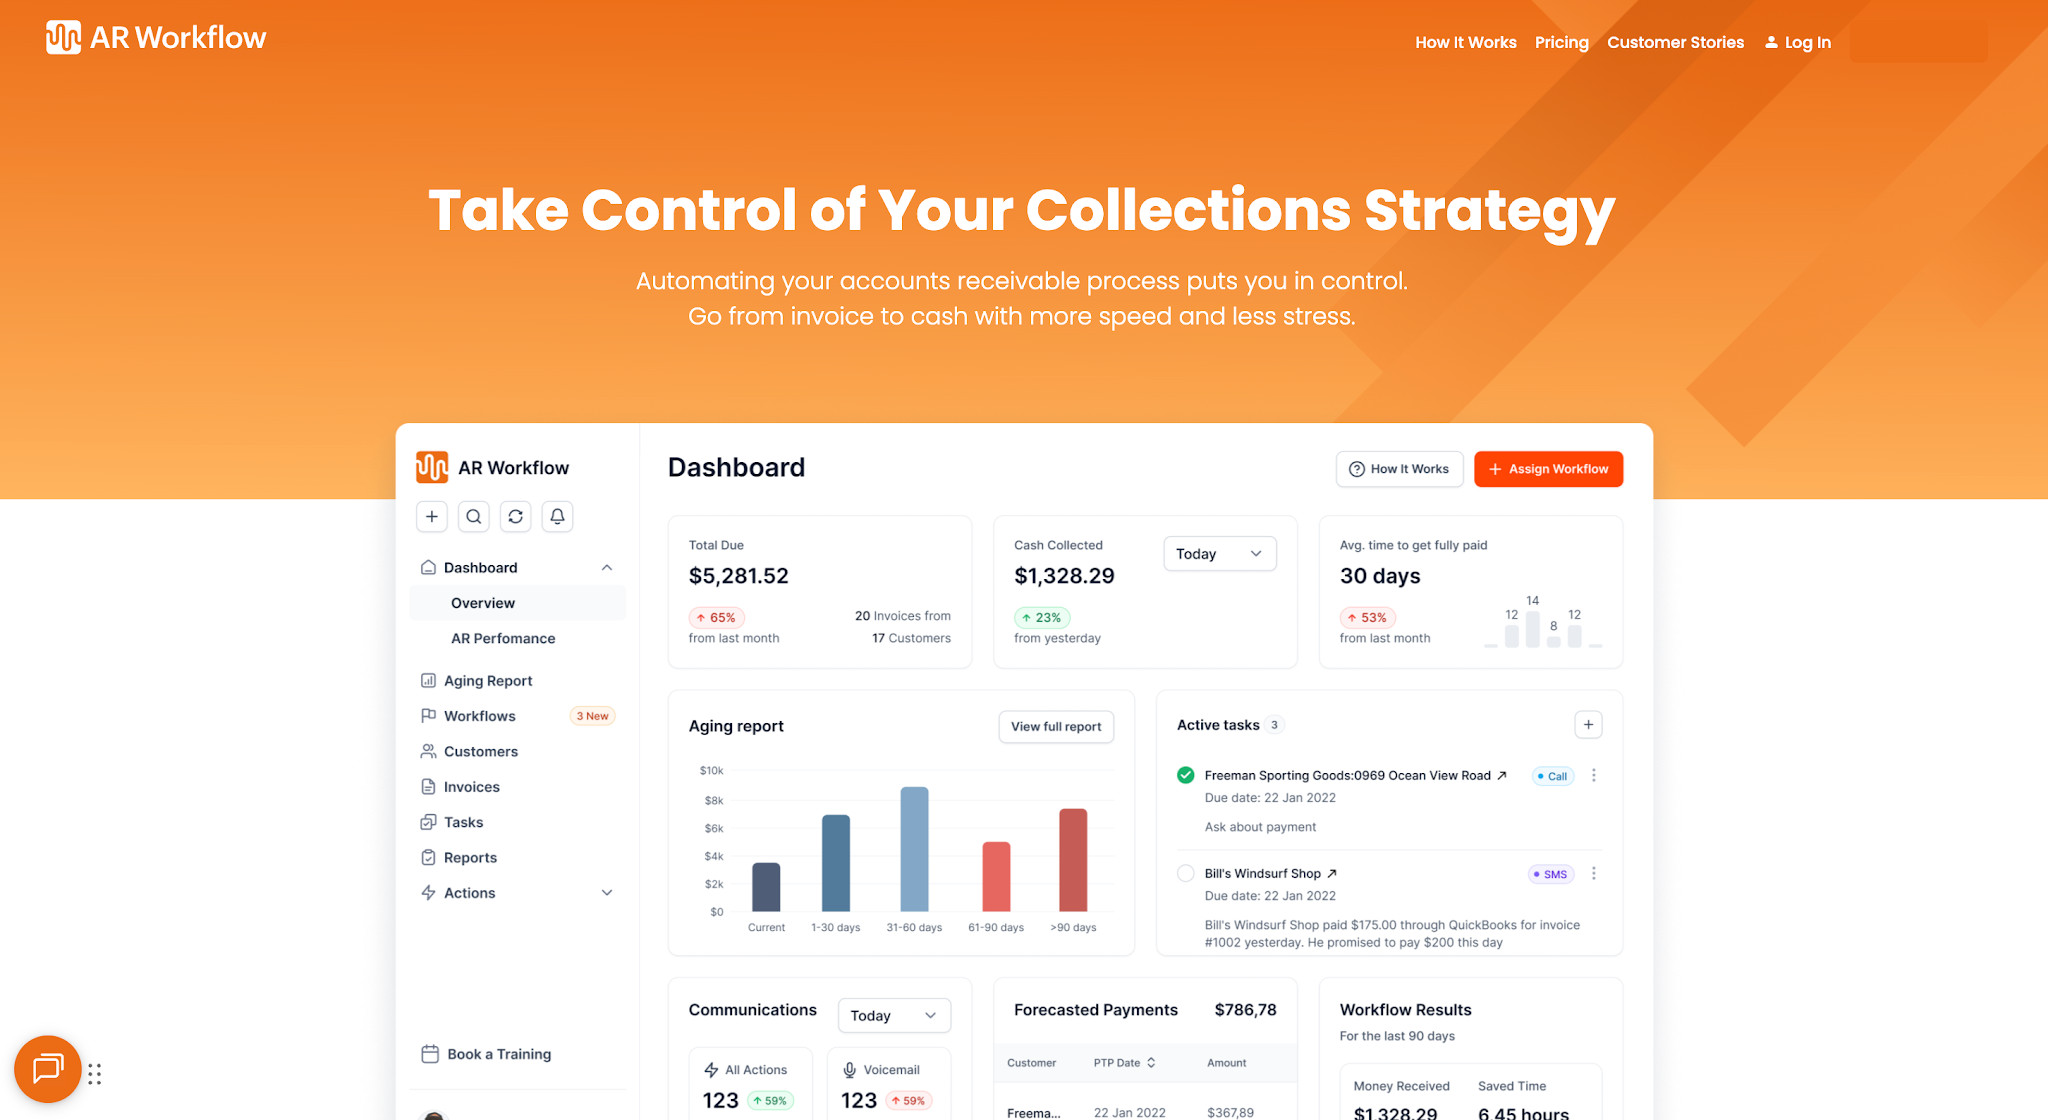
AR Workflow picks up where the invoice leaves off.
A restoration invoice template gives your team a consistent way to bill completed jobs. But if you're already sending accurate invoices and still waiting too long for payments, preparing the invoices probably isn't the part of your billing process that needs the most attention.
It's what happens between sending those invoices and collecting the money you're owed.
That's the part of the process AR Workflow helps you manage. Built specifically for restoration companies, the platform automates collection follow-ups via email and SMS from a dedicated number, so your team doesn't have to chase every overdue payment manually.
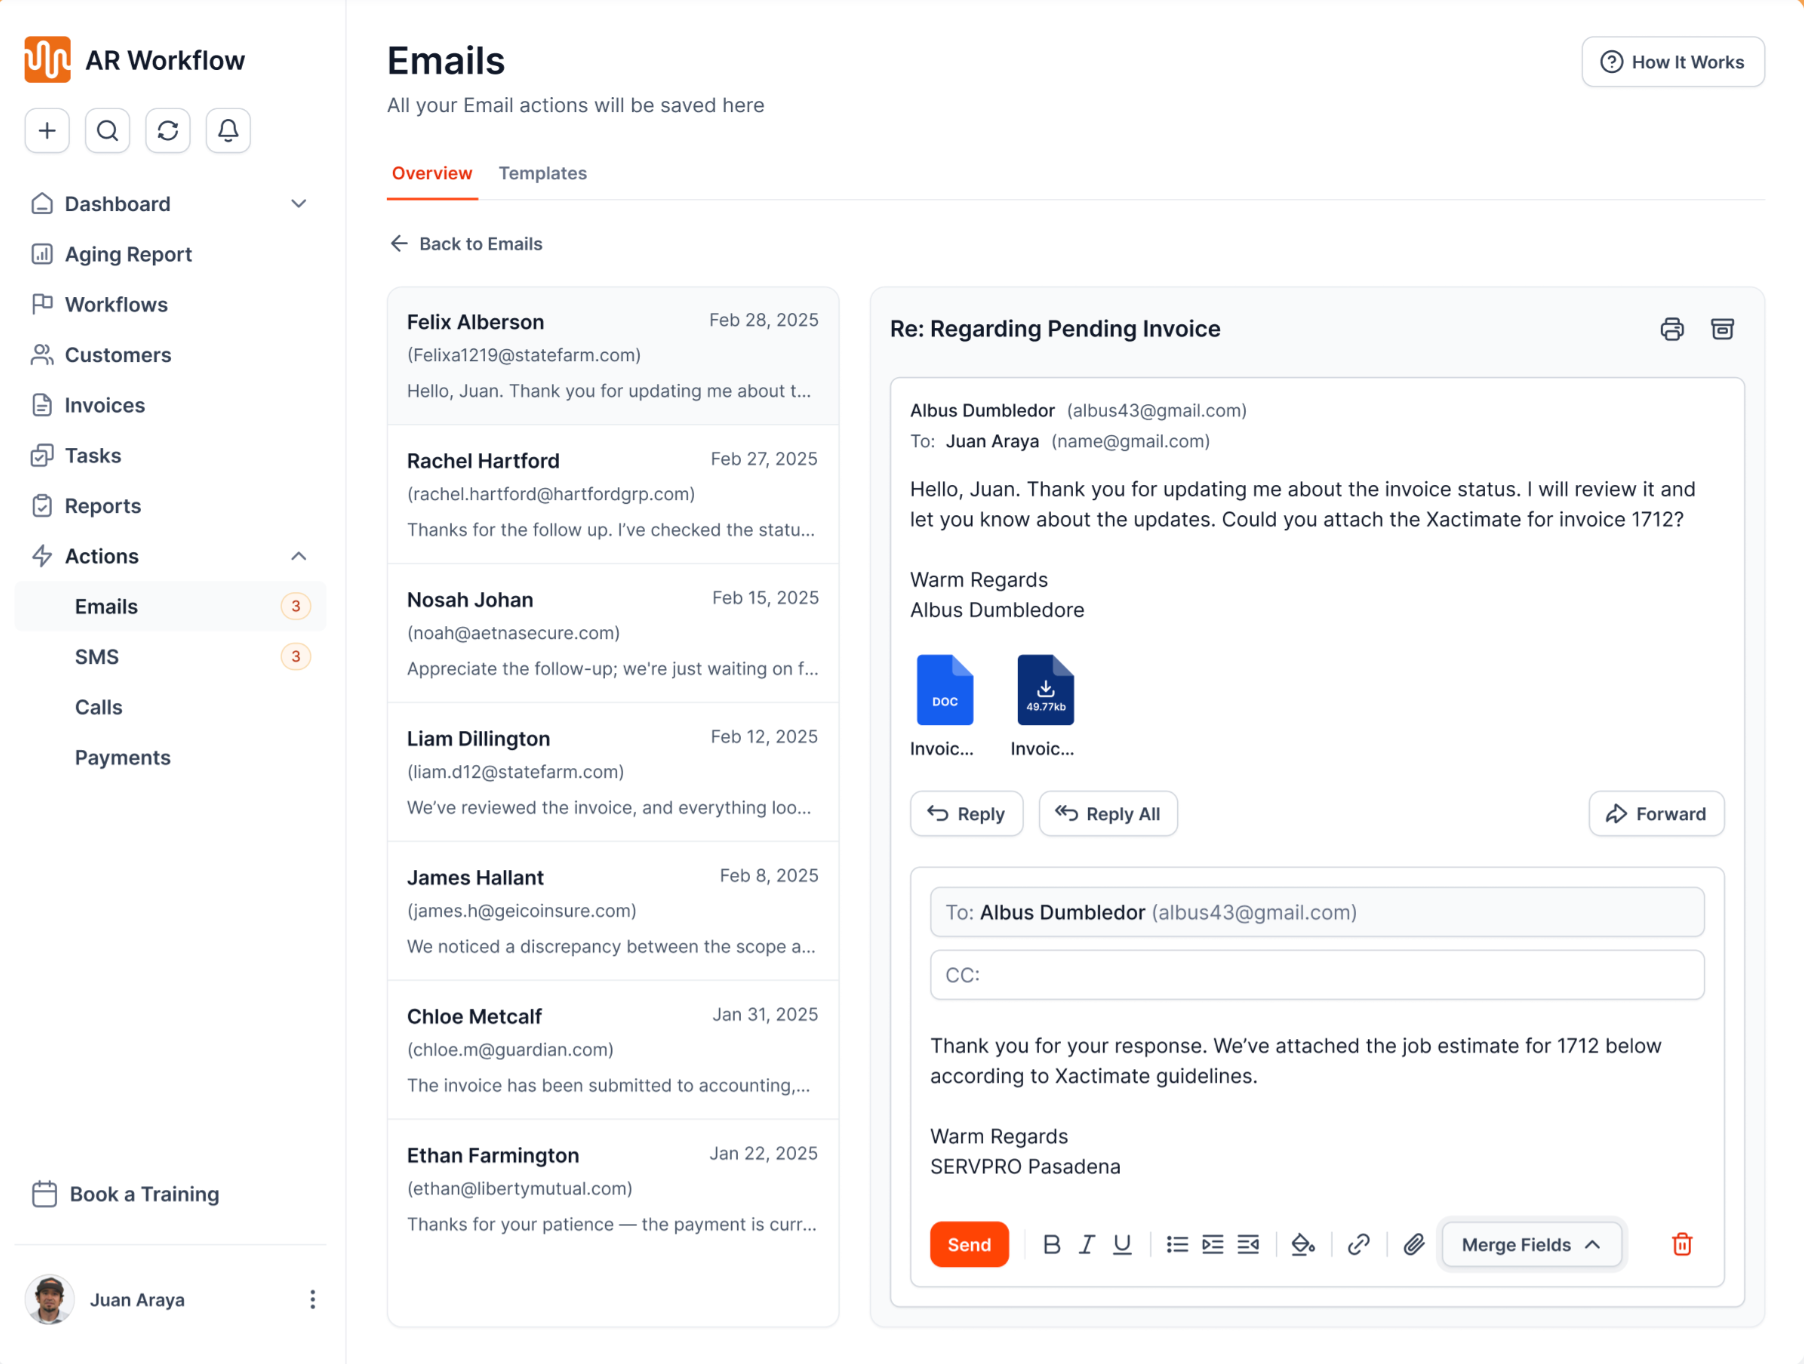
Automated email follow-ups run on the schedule you set.
The software also gives you real-time visibility into outstanding invoices and provides convenient online payment options to make it easier for customers to settle their balances. Payment links go to the homeowner or customer who owes the balance, not to the carrier or adjuster.
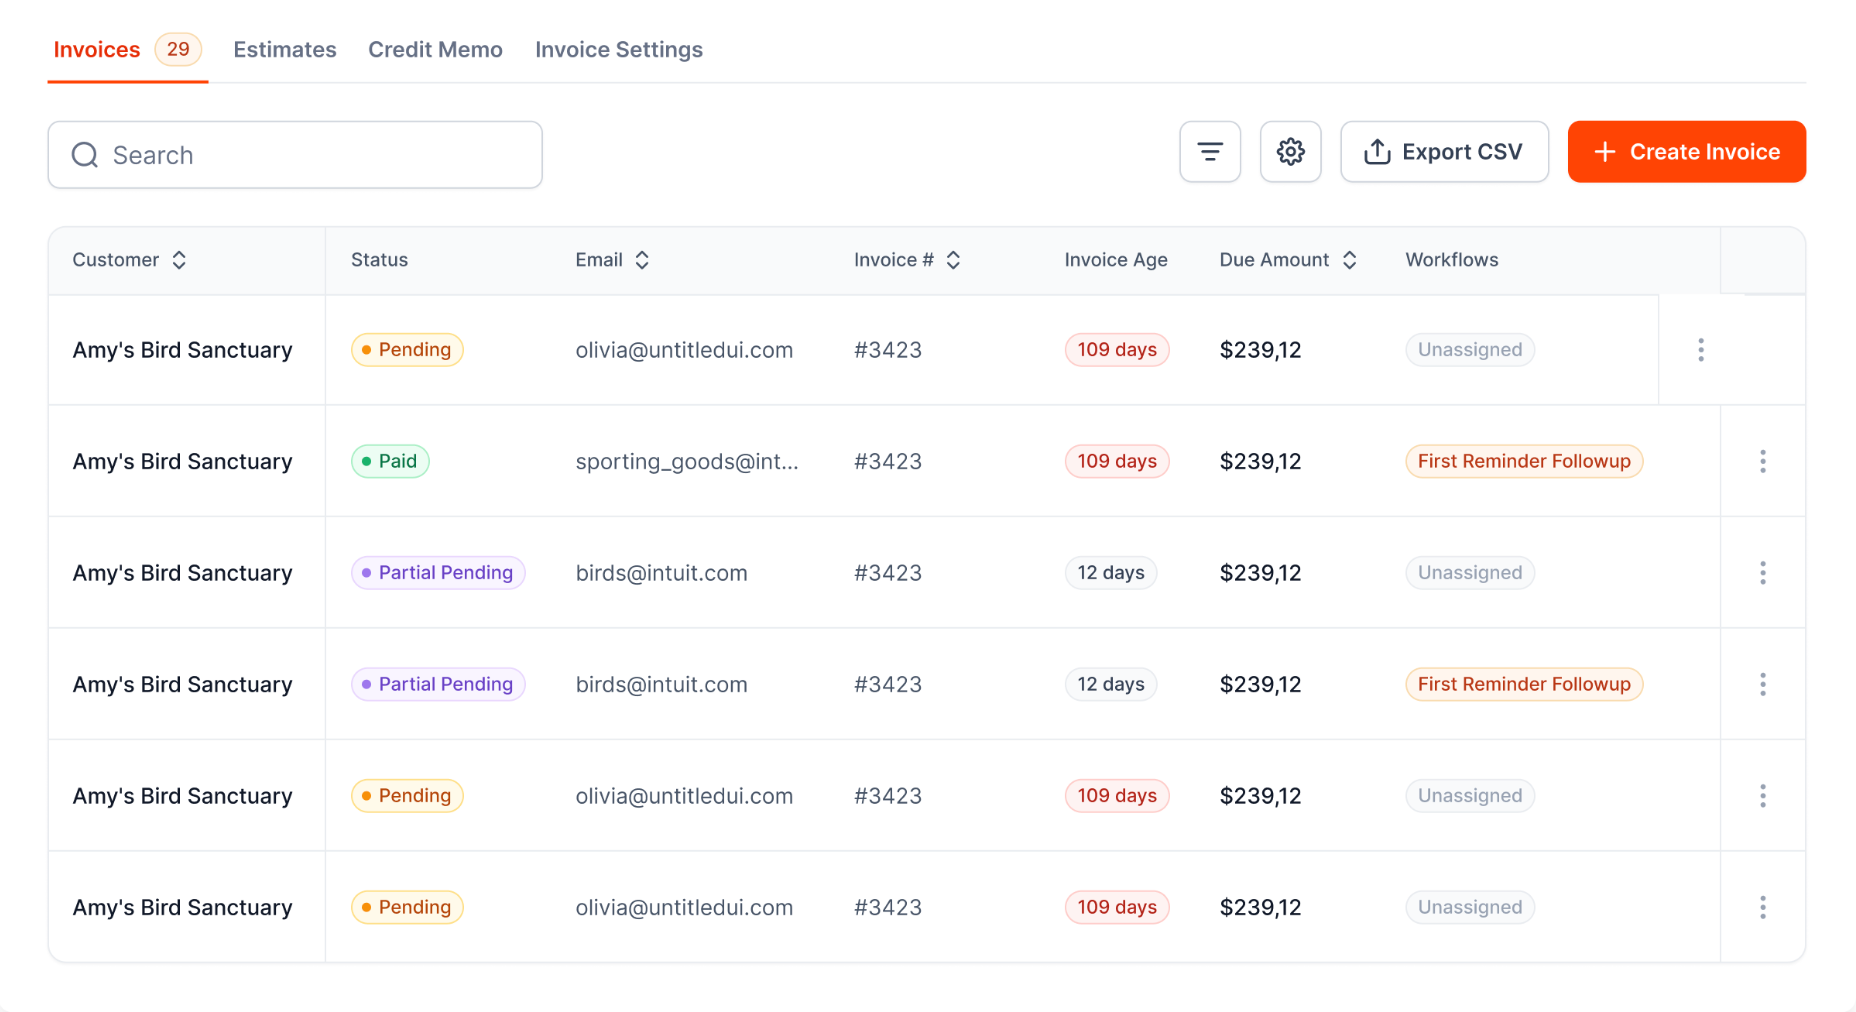
Real-time visibility into every outstanding invoice.
The goal isn't simply to send invoices faster. It's to make sure the work your company has already completed turns into the cash it needs to keep operating without putting more administrative work on your team. If you're comparing tools, see our guide to restoration billing software. Our restoration invoicing software guide is in the reading list below.
A restoration invoice lists your company and customer details, the invoice number and date, the service address and dates, the insurance carrier and claim number when there is a claim, each service with quantity, rate and amount, and the total with any deposits subtracted. Finish with the due date, accepted payment methods and payment terms so the customer knows exactly how to pay.
Start from a repair invoice template and include your business and customer details, the repairs completed, and an itemized breakdown of the costs. Add the invoice date, total amount due, and payment instructions. Review the charges against your job records before sending it. The free home repair invoice template above has every field you need, with a filled-in example.
Yes. ChatGPT can generate an invoice template or draft an invoice using the business details and service charges you provide. However, you'll still need to verify the information and calculations before sending it to your customer.
You can download the free restoration invoice template in this guide and customize it with your logo, rates and payment terms. Save a blank master copy so every new invoice starts from the same format.
An itemized invoice lists each service, material or piece of equipment on its own line with a quantity, unit, rate and amount, instead of one total. On restoration jobs it is the standard because adjusters and homeowners need to see how the total was built before they approve it.
Send it to whoever is responsible for payment under your agreement, which is often the property owner, and include the carrier name and claim number so the insurer can match it to the claim. Rules on who can be billed vary by policy and by state.
Related reading
Your invoice, not a feature tour.
Bring one overdue invoice to a demo and see what AR Workflow would send, when, and how your customer would pay.
Sam owned and ran three restoration companies for more than 14 years and collected over $100 million in receivables. He built AR Workflow in 2020 to give contractors the collections system he wished he'd had.

AI writes the emails, sends the texts, and leaves the voicemails. Your team handles the conversations that matter, and your cash keeps moving.
 Keep QuickBooksStart with one invoiceStay in control

 Log in